How to Deploy SvelteKit to DigitalOcean App Platform
Published Oct 14, 2023
Why DigitalOcean App Platform
SvelteKit is a great choice for web developers because of its simplicity. It is no surprise that it is such a loved framework on the Stack Overflow developer survey. DigitalOcean App Platform keeps a great deal of simplicity loved by developers when it comes to deployments, without making sacrifices in regards to pricing for higher traffic systems. So, in this tutorial we will walk through deploying a simple SvelteKit app onto DigitalOcean App Platform.
Deploying SvelteKit to DigitalOcean App Platform.
All code for this tutorial will be available at this GitHub repository.
Create a SvelteKit App
For the purposes of this demo I will use the default sample app, but feel free to follow along with whatever you choose. First we begin by creating a sample app with the code available at the getting started section of the SvelteKit docs.
npm create svelte@latest my-app
# follow install settings...
cd my-app
Configure Node Adapter
Next, we need to configure the node adapter to prepare for our deployments. The SvelteKit Docs have a great section on the Node adapters we will follow.
Simply run:
npm i -D @sveltejs/adapter-nodeand update svelte.config.js to
import adapter from '@sveltejs/adapter-node';

export default {
	kit: {
		adapter: adapter()
	}
};
After performing these steps, remove @sveltejs/adapter-auto from package.json.
Prepare Digital Ocean Deployment
Next, we need to deploy our SvelteKit App to DigitalOcean. We can begin by creating an app and connecting our repository in order to enable automatic deployments. So first, select your Service Provider. In my case, this is GitHub, so I selected GitHub and gave GitHub permissions to view this repository. 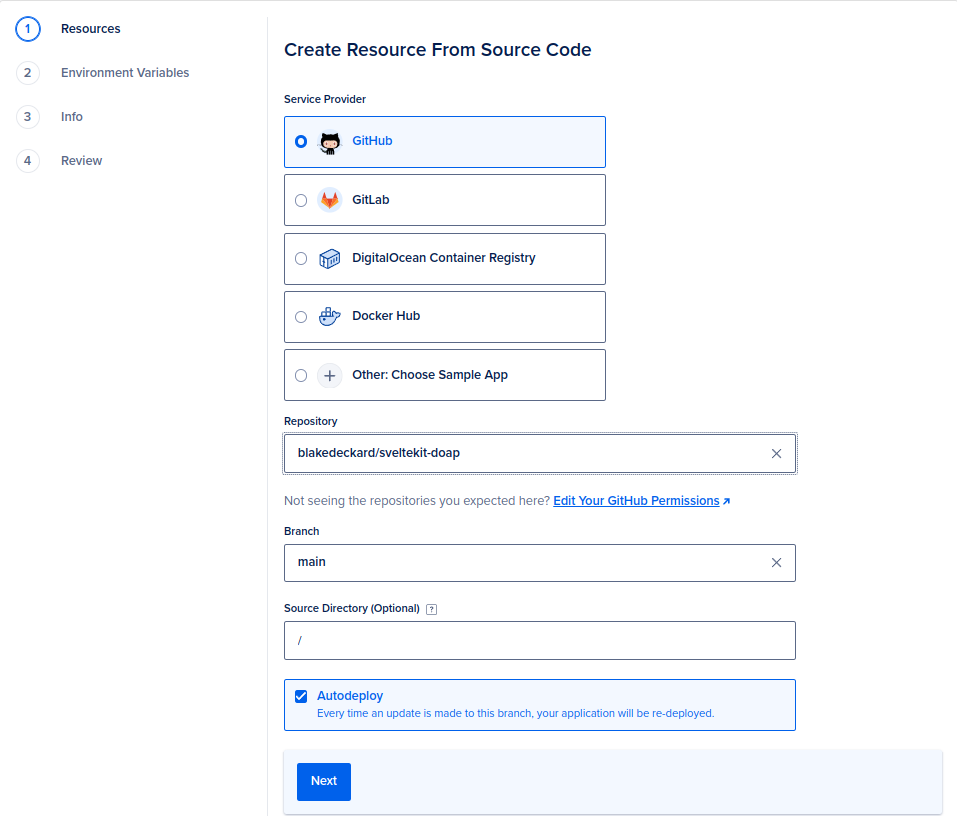 Next, our app is configured, so we should select edit right of the name of the repository, in order to edit the application settings and prepare it for deployment.
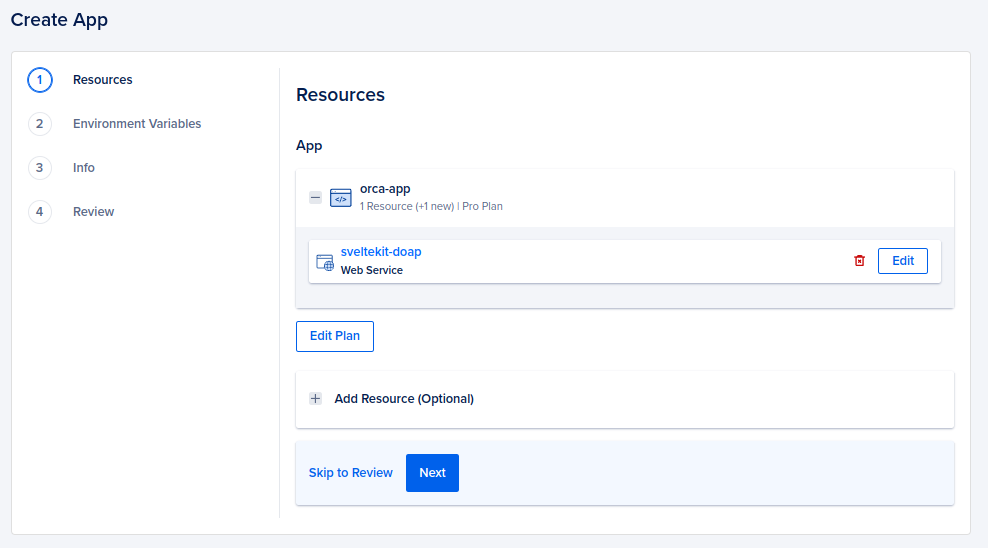
Configure DigitalOcean App Platform Deployment
Here we will change the run command to node build, and the HTTP port to 3000. 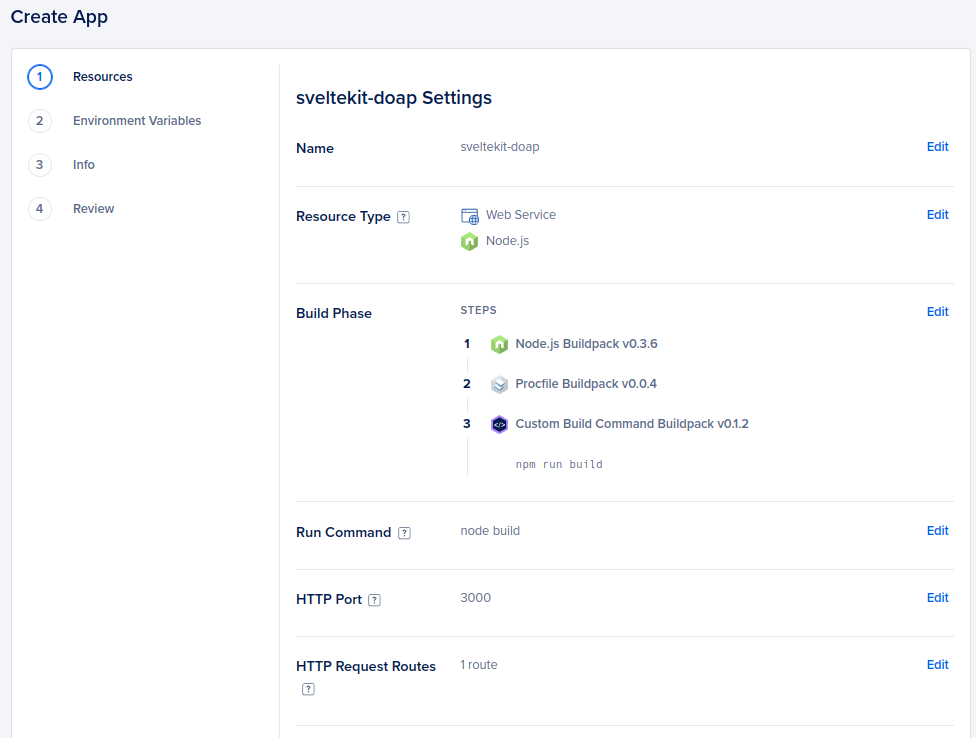 Next, return to the resources page and edit your plan. Select the plan in best for your use case, for mine this is the $5.00/month basic plan.
 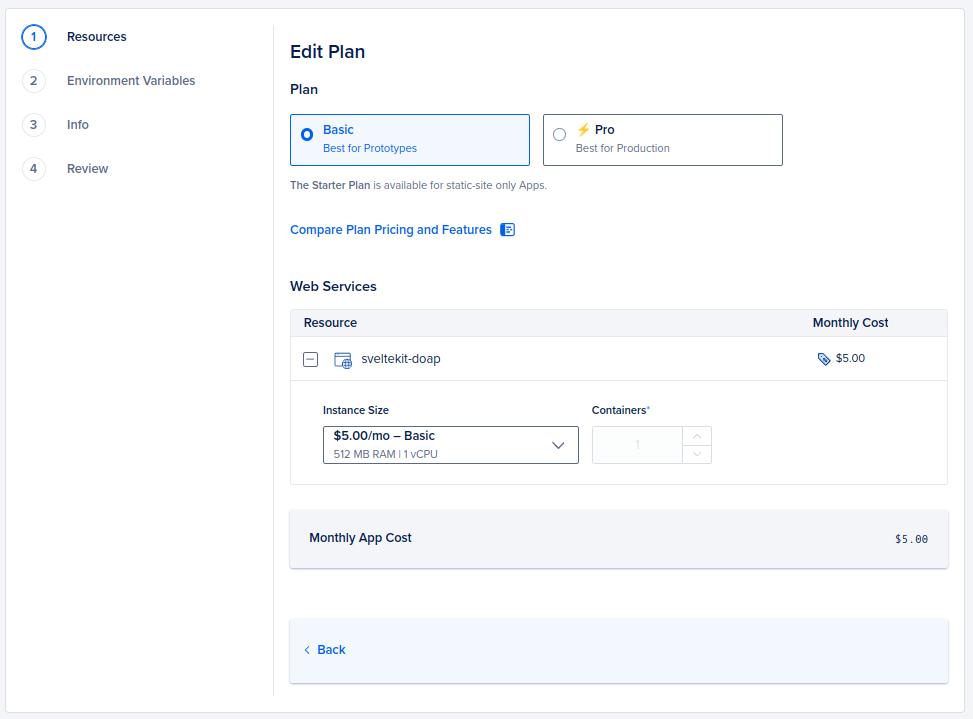 From here on out, just click next until you reach create. For more complex projects, more settings will need to be configured.
Configure DNS
Next, we can point our app to our custom domain so that it is not the default domain provided by DigitalOcean. I am going to let DigitalOcean fully manage my DNS by using their custom name servers, so I navigated to my DNS provider, and added the following records to the custom name servers section:
ns1.digitalocean.com
ns2.digitalocean.com
ns3.digitalocean.com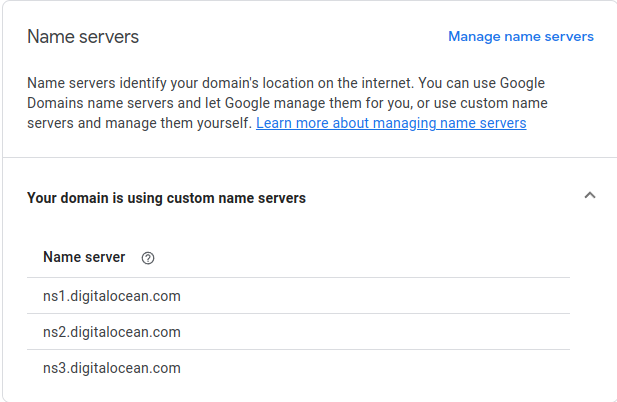
Done!
For any inquiries on this article or any further questions, feel free to reach me at blake dot deckard dot personal at gmail dot com.